General Metal Polishing Instructions

General Instructions For Polishing

Suppliers of an extensive range of polishing products and accessories to professionals, retailers and the DIY enthusiast.

What is Polishing 

Polishing sometimes known as finishing, buffing or colouring is the process of removing scratches and abrasions from a surface, and creating the desired brightness of finish on that surface.  Polishing, like using sand paper, consists of procedures each of which is less abrasive than the previous. A combination of mops and compounds are used with a buffing machine or a household electric drill (pneumatic tools may also be used but only at relatively low speeds (4000 rpm max.)

Different combinations of polishing wheel and compound gives the desired cut / colouring action and finish. To avoid contamination or mixing of compounds use a different mop for each compound. Do not mix different compounds on the same mop. Alternatively “freshen” the polishing wheel with a wire brush to remove residue compound and metal from the wheel.

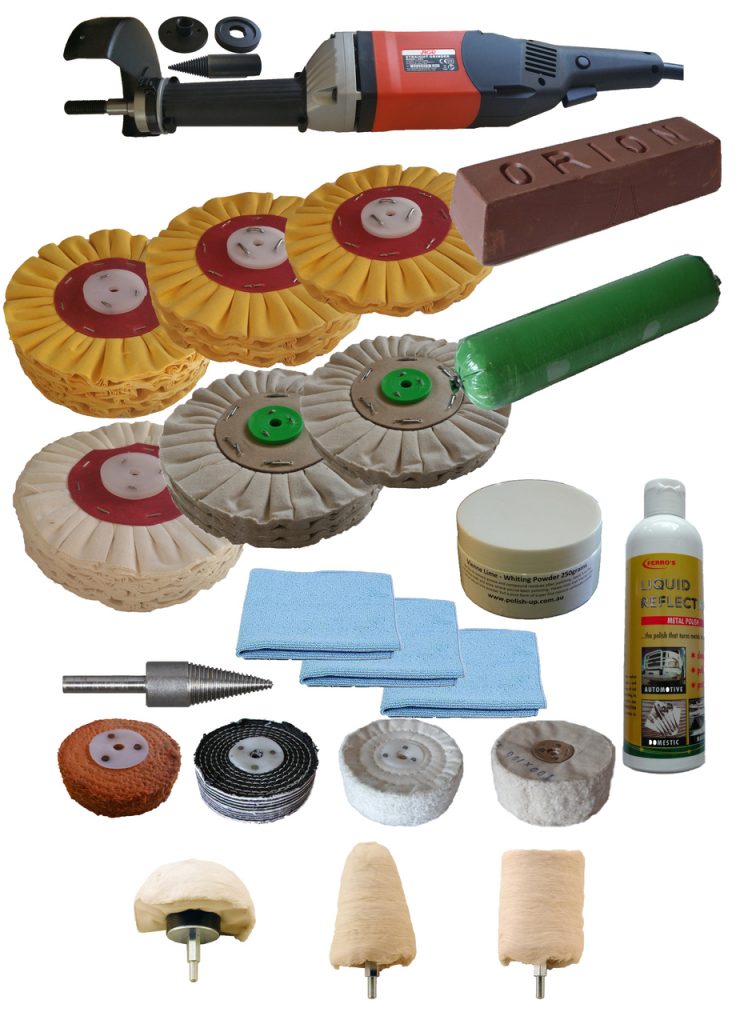
Alloy wheel kit

Drill mounted Polishing Kits

Drill mounted polishing kits for those small,tighter spots


If you are polishing small articles then you can fix your drill into a vice, this will enable you to polish these small articles with ease.

Sometimes when you have polished you may see a slight coat of grease or finger marks on the work piece, these can be removed with Whiting Powder followed by Liquid Reflection or Mirrorfinish Metal Polish to complete the job.

If you wish to Electroplate or lacquer the polished article please make sure you use a good degreaser and do not protect with wax polish. Any dirt or grease/wax will interfere with the adhesion of the plated metal or lacquer.

Surface Polishing Preparation 

Unclean/dirty/greasy material should be prepared properly before being polished. For polishing soft metals and depending on the surface condition, start at 6 on the step by step guide above. Should parts be heavily scratched, marked or scored then suitable abrasives should be used.( flap wheel, abrasive cloth/paper, rubbing blocks etc. )

In many instances the surface of what you are polishing will need to be prepared prior to polishing. The preparation really depends on the condition of the surface and the desired finish you require. The devil is in the detail hence the better you prepare the surface the better the final result. The use of wet/dry abrasive papers and discs may be required and the finer the abrasive, generally the easier and more impressive the polished finish.

Drill-Polisher-Grinder AdaptorsPolishing Wheel Spindle Adaptor Kit
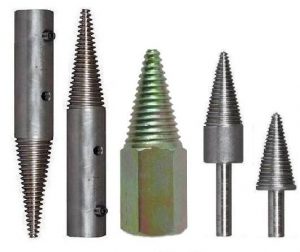
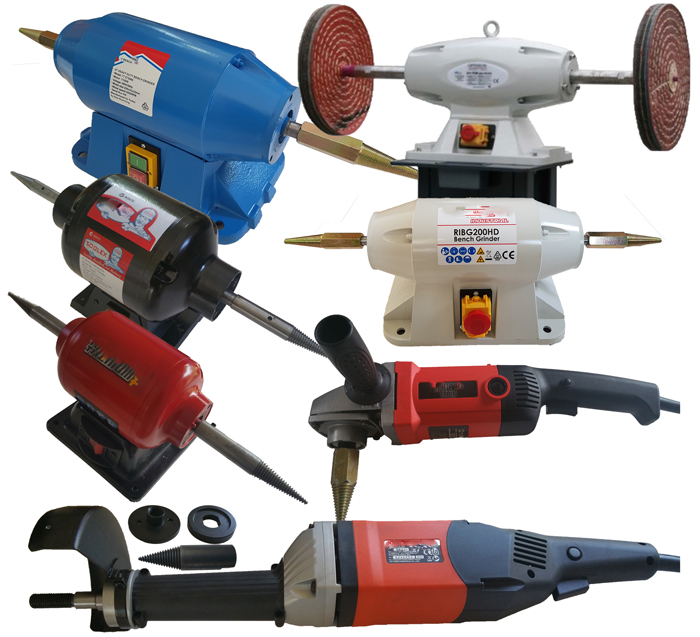
Spindle adaptors, tapered Mandrels are used to secure your polishing wheels onto your drill machine, bench grinder, variable speed polisher/grinder etc.

Before purchasing an adaptor check the dimensions of the shaft and threads to see if we have the relevant adaptors for your machine.

Description Of  Polishing Wheels & Mops

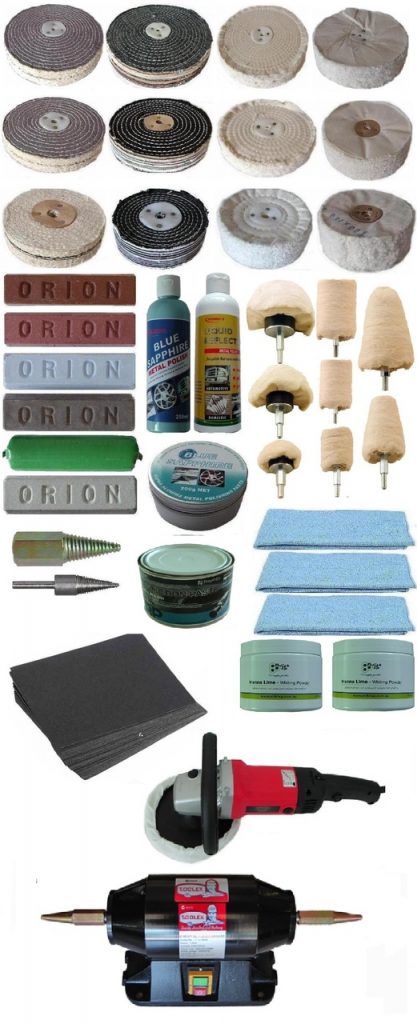
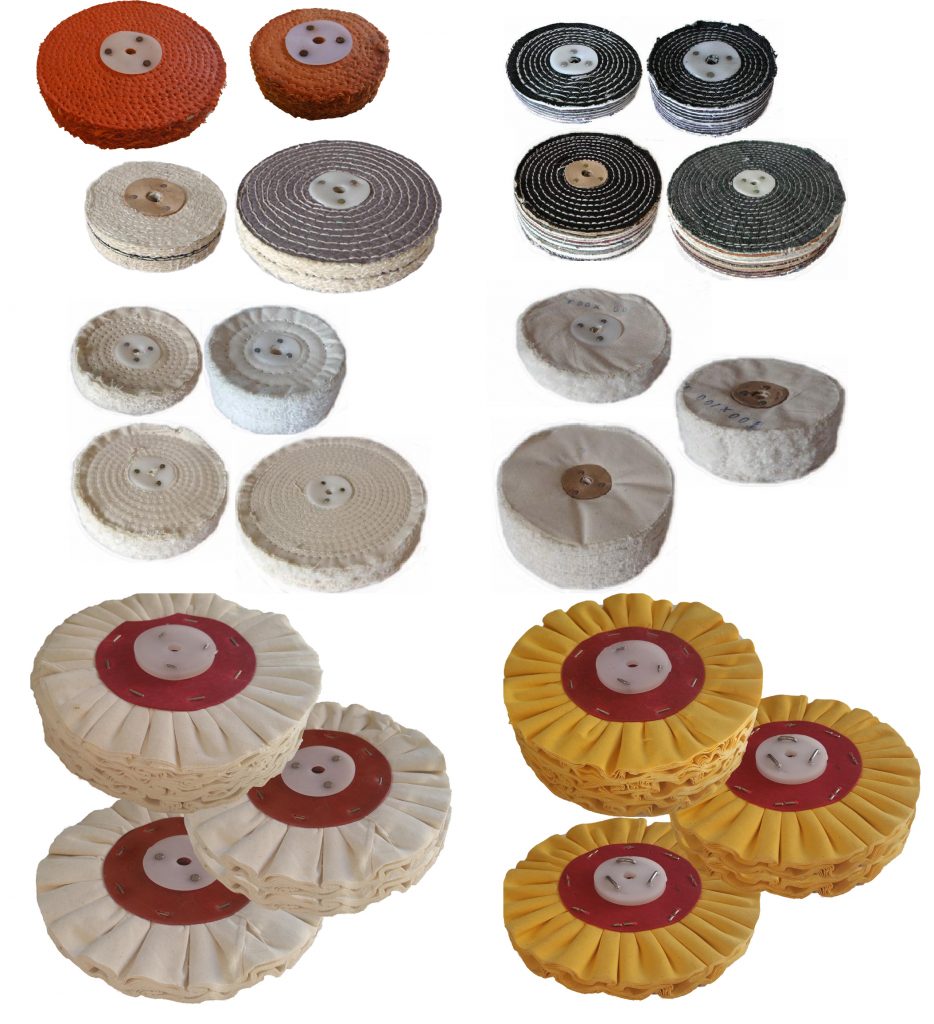
Sisal Polishing Wheel.

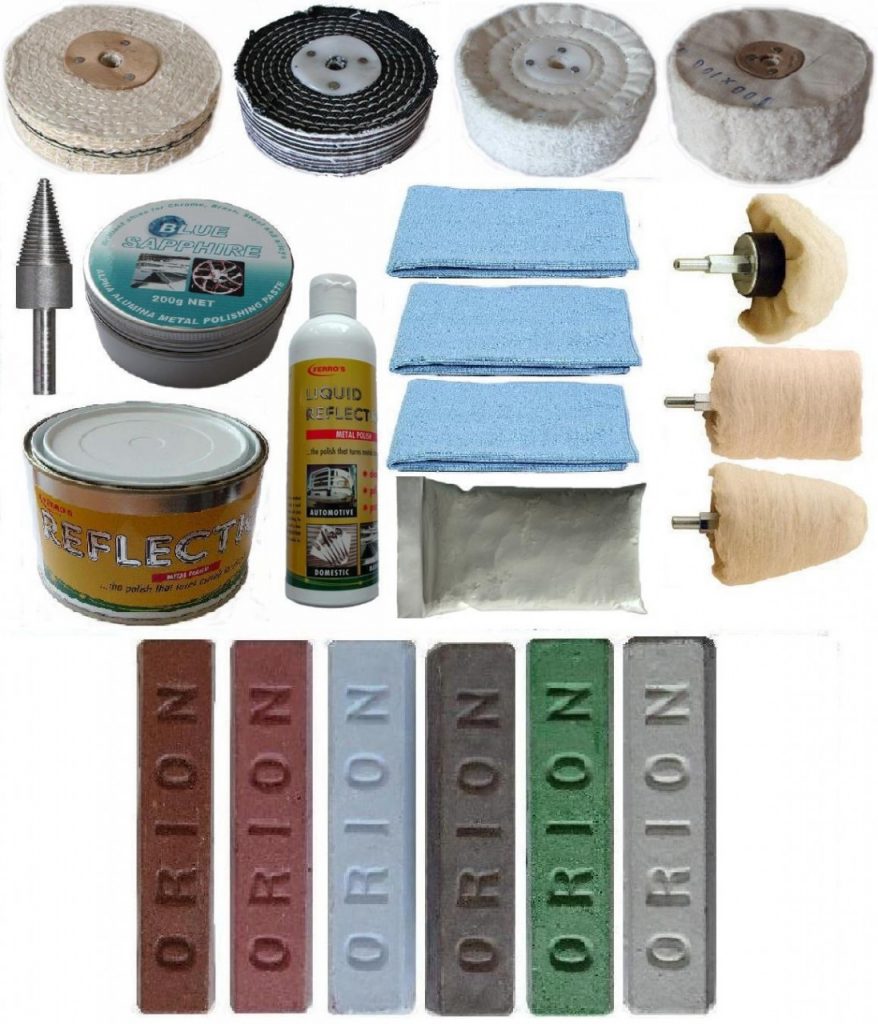
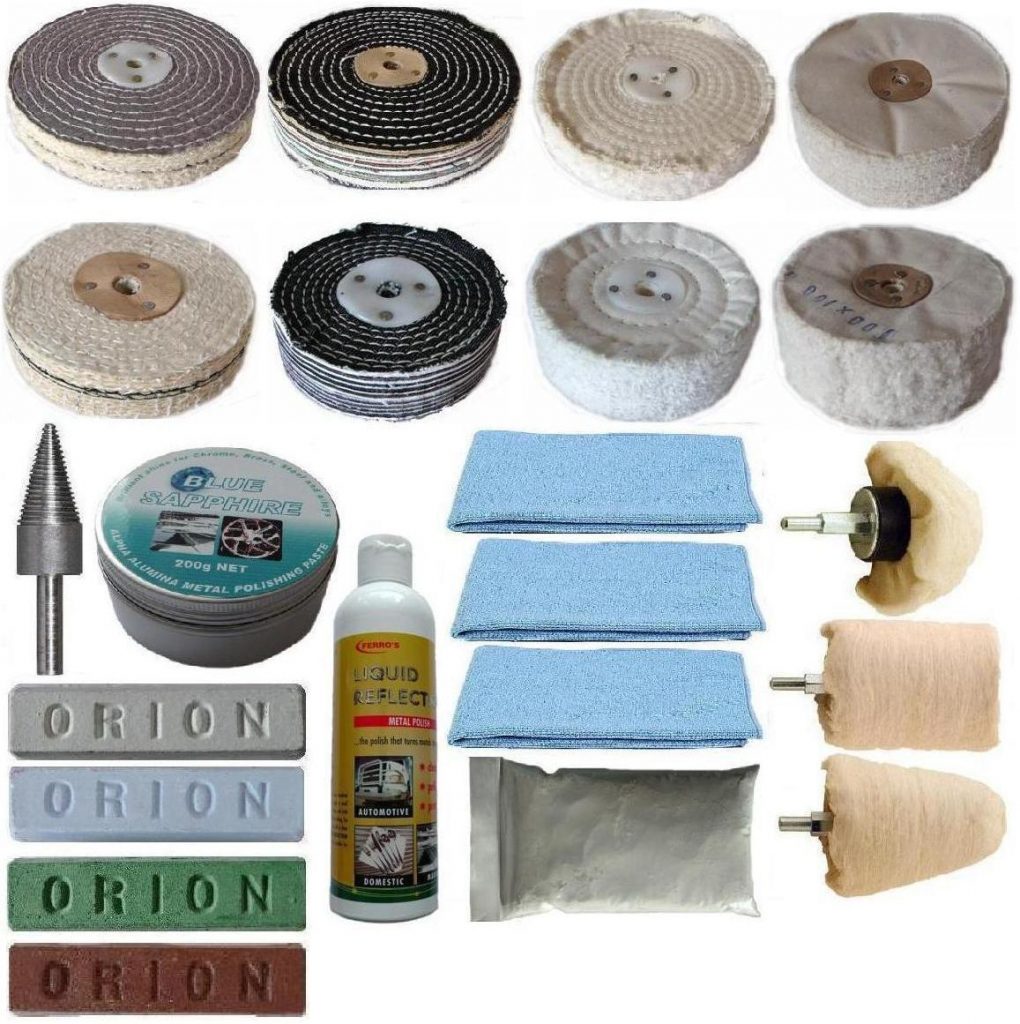
These are very fast cutting and hard, they are particularly useful for first stage heavy duty mopping operations on steel and non-ferrous metals. They will remove grinding marks left from previous operations, when processing steel, stainless steel or non-ferrous metals and are usually used in conjunction with a coarse cutting stainless steel polish.

Colour Stitch     

White Stitch Polishing Wheels.

Versatile cutting mops used for general polishing, can be used for first stage polishing with Brown polishing compound on soft metals (brass, copper, etc), or for second stage polishing on hard metals with Pink polishing compound.

Loose Flap Quality Polishing Wheel.

A harder grade of loose mop which is commonly used as an alternative to white stitch mops. Very popular for precious metals.

Swansdown (WDR) Polishing Wheels

A very soft grade of finishing mop. WDR means “white double raised” and these wheels are also know as Swansdown wheels. Generally used for soft precious metals, jewellery etc. in the final finish.

Airflow Treated and Untreaded Polishing Wheels

Quality materials are used in the manufacture of these wheels, ensuring a longer mop life and greater output compared with conventional mops. They are very clean in operation and are specially suited for heavy duty moping and finishing on metals, plastics and other non metallic materials. The treated Airflow wheels are more aggressive and used in the cutting, first stage of polishing whilst the untreated airflows are for finishing.

Dome Cylinder Goblet Polishing Wheels

Supplied in sisal and calico these drill mounted polishing mops are used to access tight and difficult to reach areas.

Excellent for use in maintenance kits, the calico mops can be used with most of our compounds.  The sisal mops can effectively be used with our cutting compounds.

Mounted Felt Cylinder Bob

Versatile across many mediums, these medium density points will work on stone, ceramics, metals, as well as jewellery. Bonded onto a 3mm/6mm shaft that fits most rotary tools or drill machines. These felts tools are a popular and economical method of polishing when used in conjunction with compounds.

Safety First!

Always make sure that the machine you are working with is in safe working order i.e. bench grinder is securely fastened to your work bench, adaptors polishing wheels are securely fastened etc.

Always use safety equipment- Dust mask, safety spectacles and gloves should be worn at all times. 

Always apply the item being finished to the area of the mop which is rotating away from yourself.

Do not wear loose clothing that may get caught in the machine.

SS Polishing Kit

Restoring Stainless Steel Sinks

Kits to revitalise your scratched sink to a high new finish.

Step By Step Guide To Polishing

  1. 1. Attach arbour to your drill or spindle adapter to your bench grinder / polisher and fix tightly.
  2. 2. Attach Sisal Mop onto the arbour/adapter and screw on tightly.
  3. 3. Run the drill / bench grinder / polisher and apply the relevant compound to the sisal mop for approx. 2 seconds, the compound is wax / abrasive based so the motion of the spinning mop generates heat which melts the wax/abrasive onto the polishing mop.
  4. 4. Apply the mop to the item to be polished with medium/hard pressure. It is very important that you remove all marks/scratches and leave a uniform finish.
  5. 5. Apply more compound to the Sisal Mop if needed. When all scratches/marks are removed and the work piece has a uniform dull finish, remove the Sisal polishing mop.
  6. 6. Attach the White Stitch / Colour Stitch Mop onto the arbour/adapter and screw on tightly. Run the machine and apply the relevant compound to the White Stitch / Colour Stitch Mop for approx. 2 seconds.
  7. 7. Apply the mop to the item to be polished with medium pressure. This will remove the dull finish left by the first process and leave the work piece with a semi-bright finish.
  8. 8. Apply more compound to the White Stitch / Colour Stitch Mop if needed. When you have a uniform semi-bright finish, remove the White Stitch / Colour Stitch Mop.
  9. 9. Attach either the unstitched B Quality Mop onto arbour / adapter and screw on tightly.

Run the drill / bench grinder / polisher and apply the relevant compound to the unstitched B or G Mop for approx. 2 seconds.

  1. 10. Apply the mop to the item to be polished with light pressure. This will remove the semi bright finish left by the second process and leave the work piece with a bright finish. Apply more compound to the unstitched Mop if needed and repeat the process.

You should now be left with a bright finish.

  1. Using a clean microfiber cloth, rub the polished article with Whiting Powder/Vienne Lime or Liquid Reflection, Reflection paste or Blue Sapphire. This will remove any residue compound, metal and grease left on the surface and provide you the polished finish.

Tips 

Try to constantly vary the directions of which you polish. This is not always possible but recommended as some articles may be of an unsuitable size and shape.

Use compound sparingly, black grease marks will appear on work piece if too much compound has been applied to the mop. Remove black grease marks with cloth. Remember little and often. If it is possible, polish across marks/scratches not along them.

If the surface of work piece is lacquered you must remove the lacquer before polishing.

Description Of Polishing Compounds

There is a substantial range of cutting, polishing, buffing compounds suited to different levels finishes depending on the polishing wheel and compound combinations.


Blue bar = Multishine: The multi-purpose finishing compound. Suitable for all metals. Also performs well as a cutter if used on a hard cotton or sisal buff.

Brown bar = Tripoli: Combined cutting and finishing compound for soft metals only. Suitable for alloys, aluminium, brass, copper and zinc diecast. Follow up with a finishing compound if a brighter surface is required.

Grey bar =Course Cutter: A fast and economical cutter for hard metals. The rate of metal removal is high, with less emphasis on brightness. To be used on sisal buffs for the removal of scratches and “orange peel” from all metals.

Green bar = green Chro

me: For mirror finishing with minimal cut. Best used after a perfect cutting or prepolishing operation. Polishes all metals to high brightness when used on a soft cotton buff.

White bar = SS Finish: For high brightness and good cut. Suitable for all metals, including stainless steel. Recommended for surfaces that are smooth to begin with and are free of deep scratches. Use a sisal buff for cutting and a cotton buff for bright finishing.

Terracotta bar = Bright Cut DX:  A fast cutter for all metals with medium brightness. May be used on a sisal buff for cutting, followed on a cotton buff for medium brightness.

Vienne Lime Cleaning Powder Or Whiting Powder: Excellent for use with our polishing kits. Use this after you have finished polishing to remove grease and compound residues after polishing. Apply it to a clean lint free cloth/microfibre and wipe where you’ve been polishing. Please note that Vienna Lime is not an actual lime powder but a pure form of super fine calcium carbonate (chalk). This will save you time and effort as opposed to using white spirit or other methods.

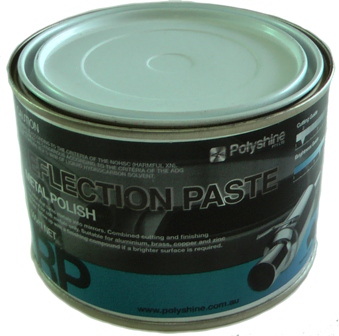
Liquid Reflect, Blue Sapphire, Mirrorfinish metal polishes and many others are used in your final application to maintain a long lasting bright finish to your polished surface. These polishes can be used in the maintenance of your polished items as well.

Surface Preparation Abrasives

Flap wheels are designed to be flexible and conform themselves to the shape being sanded. Flap wheels flex to the different dimensions and shapes of the work piece and sand flat, high and low areas with the same effectiveness. Surfaces include wood, metal, plastics, rubber, stone. Wet and dry abrasives up to 2000grit are ideal for the surface preparation of most metals and can be used before moving onto the buffs and compound combinations.

Visit our website at www.polishup.com.au to view a wide range of products and services that include the following applications:

Kits to polish glass, metals including alloys, aluminium, chrome, stainless steel, steel, copper, brass, precious metals and jewellery

Australia based, we ship Australia wide and internationally.

You can polish your motorcycle, golf clubs to new, car, truck, ute, boat, alloy wheels, fixtures and fittings to exceptional mirror finishes. The polishing wheels fit bench grinders, electric hand drills, polisher sander grinder machines. Choose from our selection of adaptors and accessories for a simple conversion.

Polished Bike1 copy scaled 1 11zon

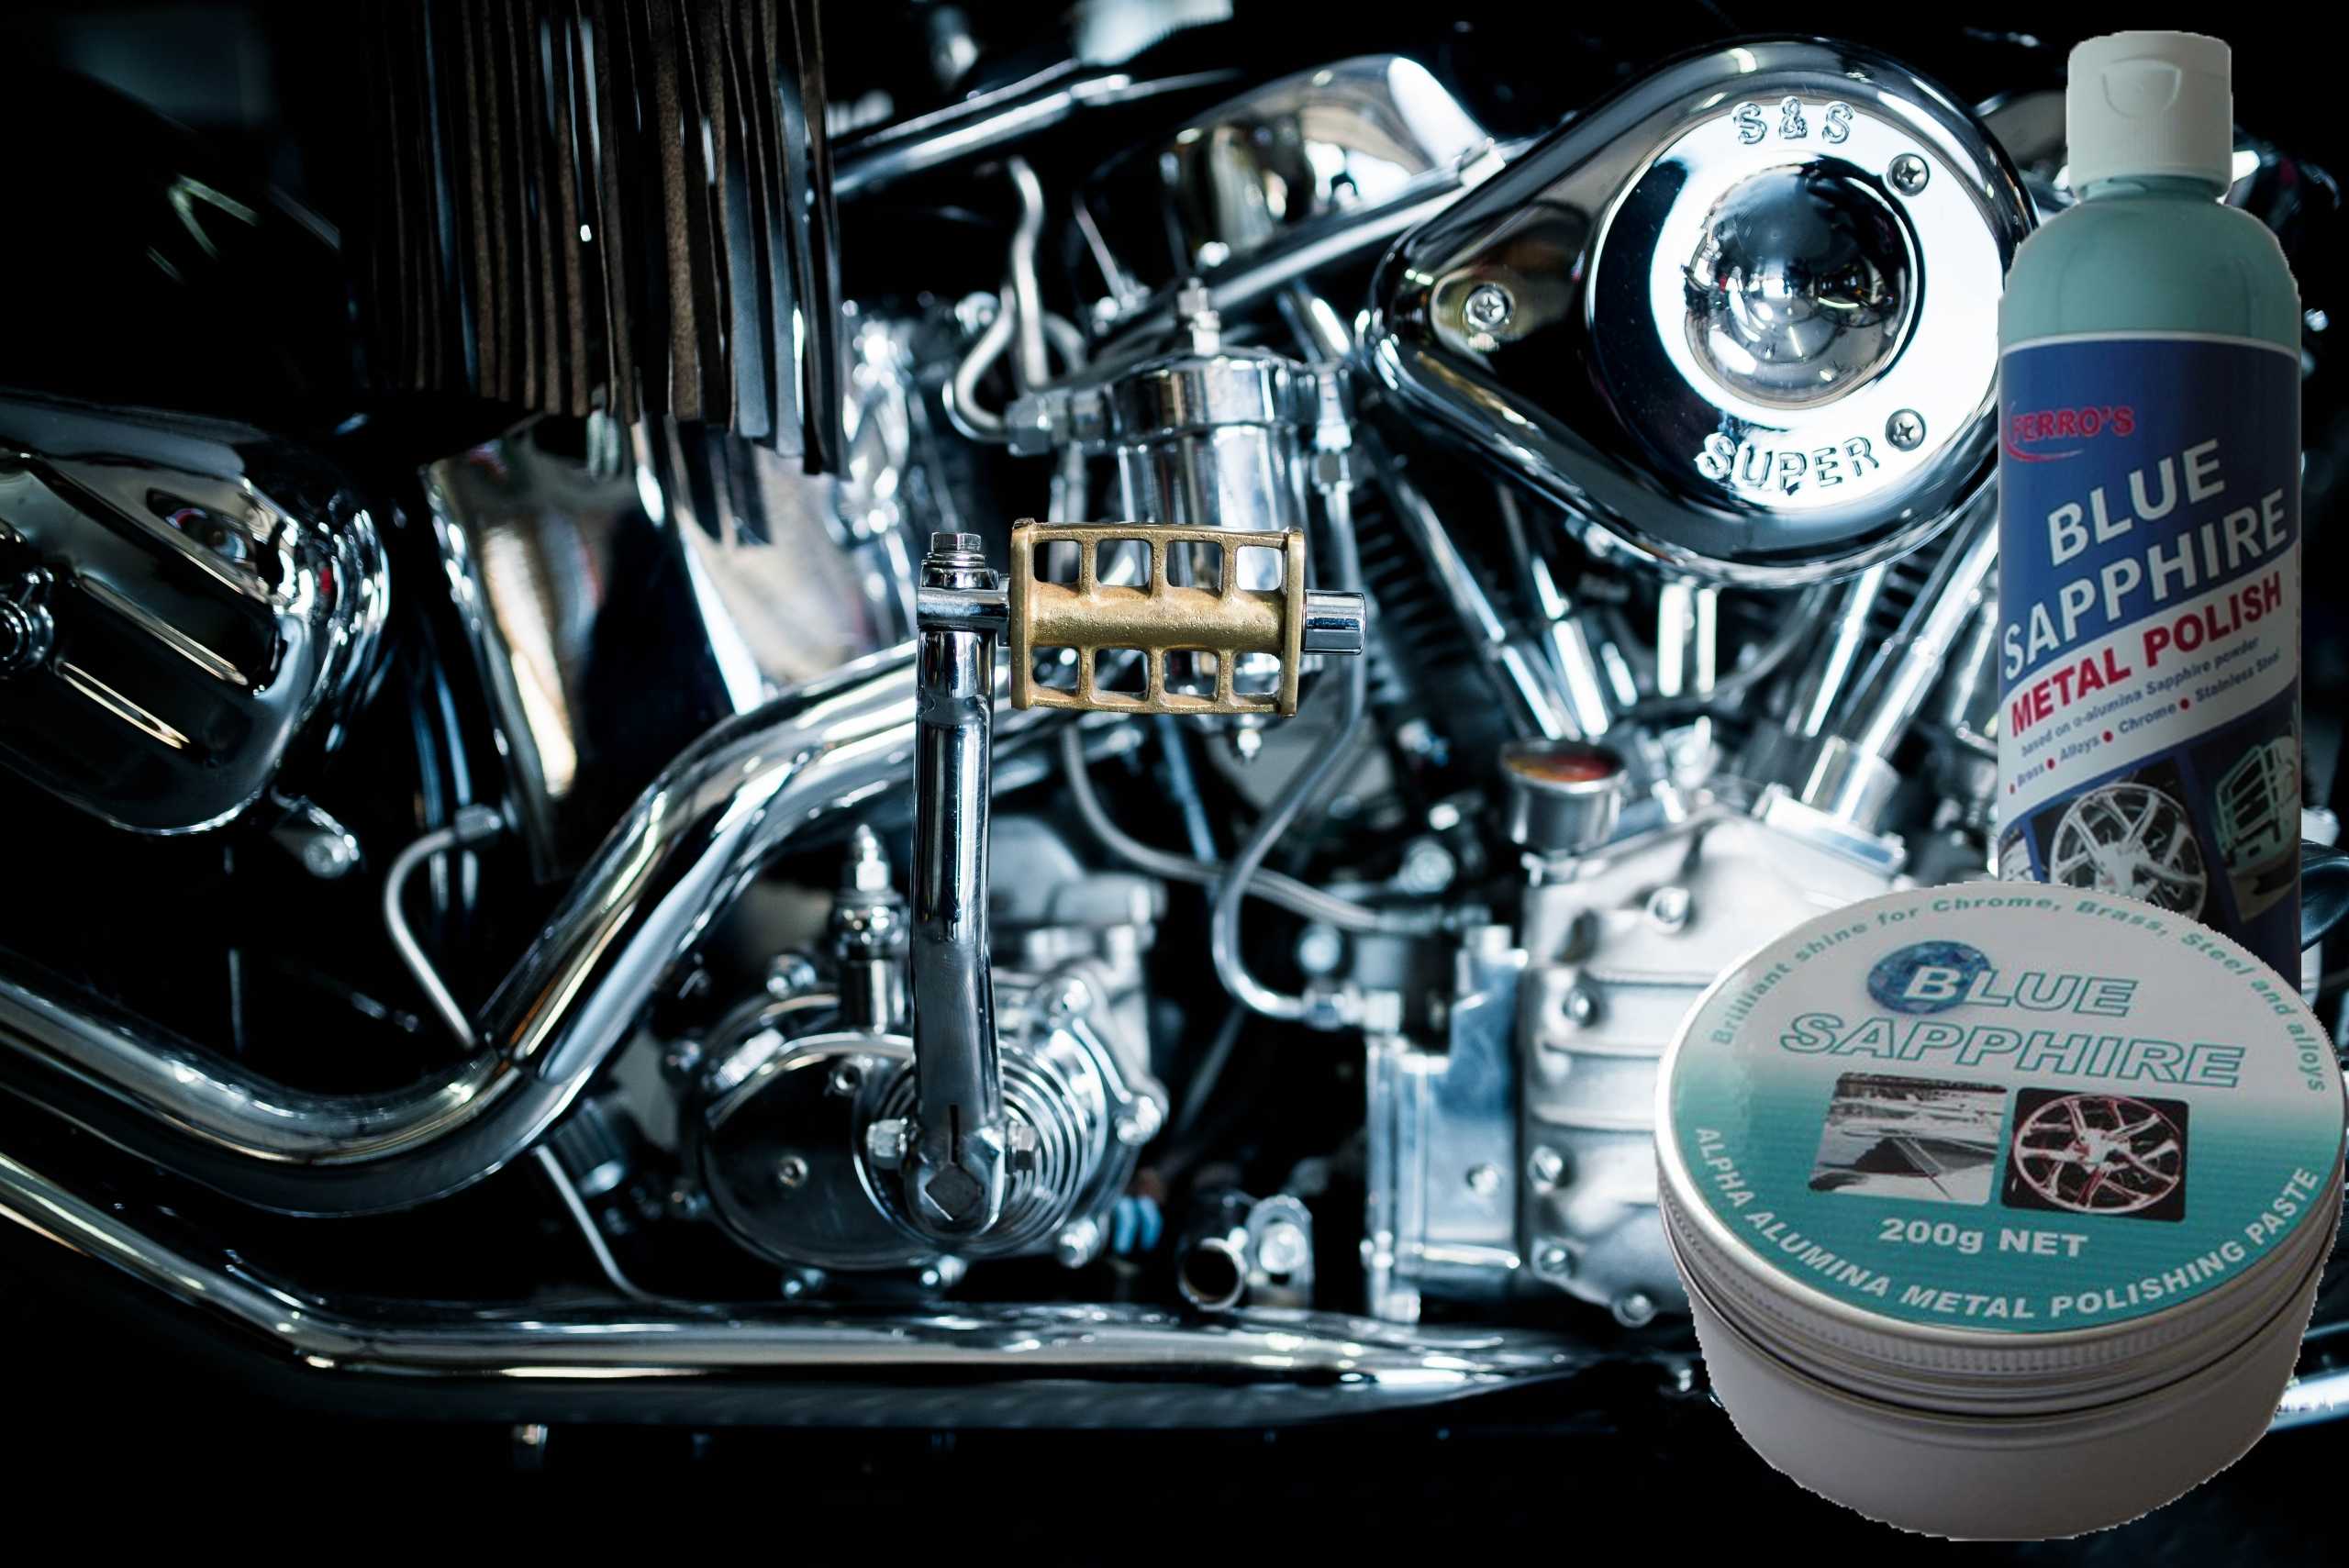
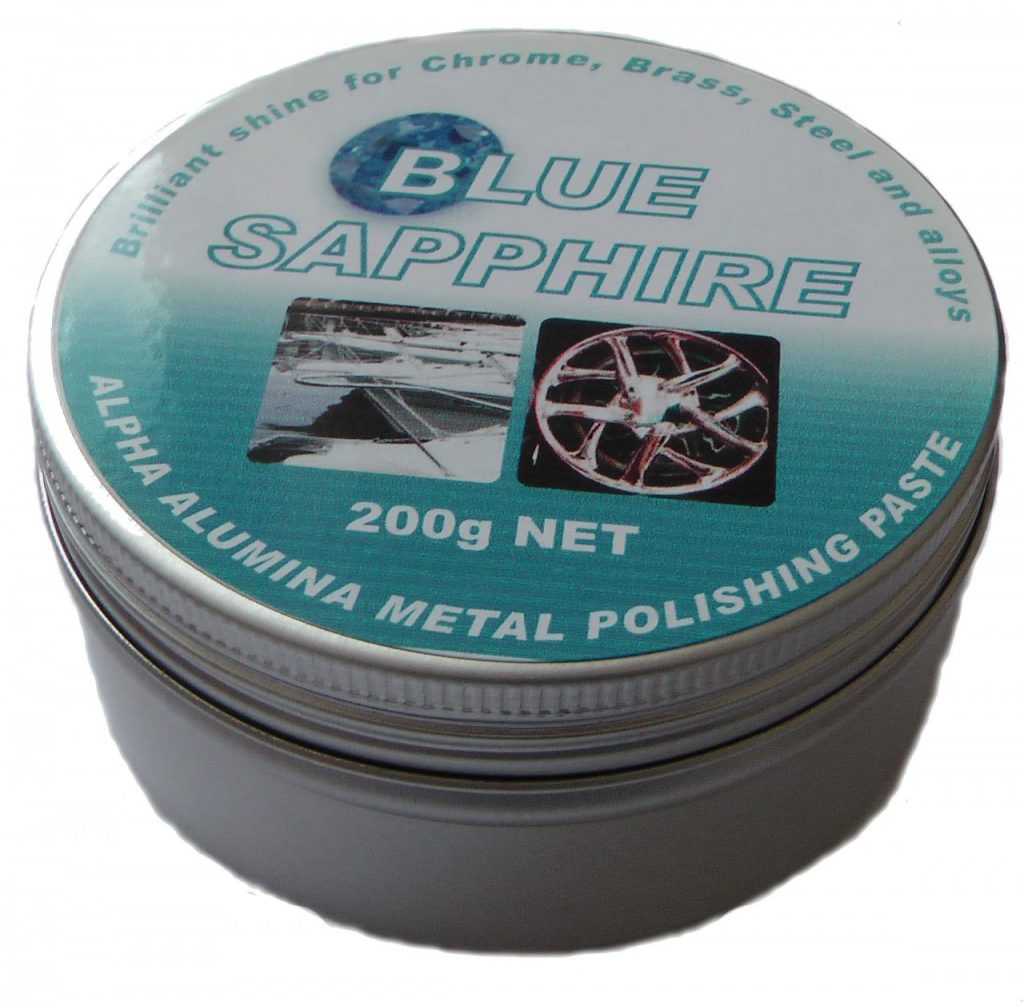
Alloy, Stainless Steel Metal Polish Called Blue Sapphire

Liquid and Paste Blue Sapphire

If you are looking for a clever polish that’ll give you a brilliant finish and make your metal surface resonate then this is the polish. Using nano technology, this product has been designed for bikes mainly but can also be used on an extensive variety of metal surfaces. The results will speak for themselves and will definitely be money well spent.

Try it!

Blue Sapphire are metal polishes that impart the same brilliant shine as Liquid Reflection, however it is designed for detailed and intricate surfaces such a motorbike chrome or antiques. After polishing Blue Sapphire dries to a fine powder that is easily brushed or vacuumed off, leaving no residue to adhere to the surface. High pressure air can also be used to blow out left over polish caught in tight nooks and crannies.

Blue sapphire is recommended for Chrome trim over Liquid Reflection as the abrasive is a little finer.

Reviews 

   5
Ultimate Match

Posted by vicki

This product when used after the tinned product really is a perfect match. Never have I seen such an amazing mirrored showroom finish after using these outstanding products. Thankyou Polish Up ! customer for life

    5
Best Polish Ever

Posted by vicki

This product in my opinion really is the best for deep cleaning metals particularly alloy. No shortcuts with cheap imitations will I take again. Definitely a winner in my book.

    5
Blue Sapphire polishing paste

Posted by Col

Product worked better than expected would highly recommend

Cerium Oxide Glass Polish | Polishing Glass

Polish Up Microfiber Cloths

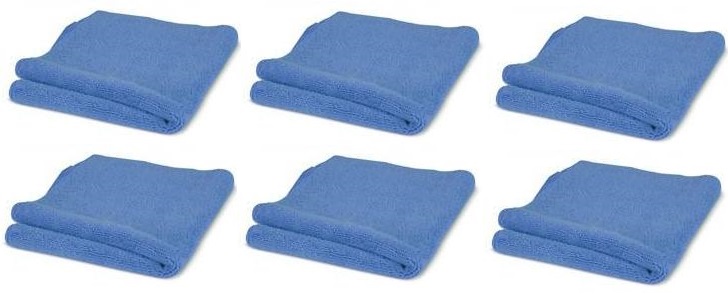
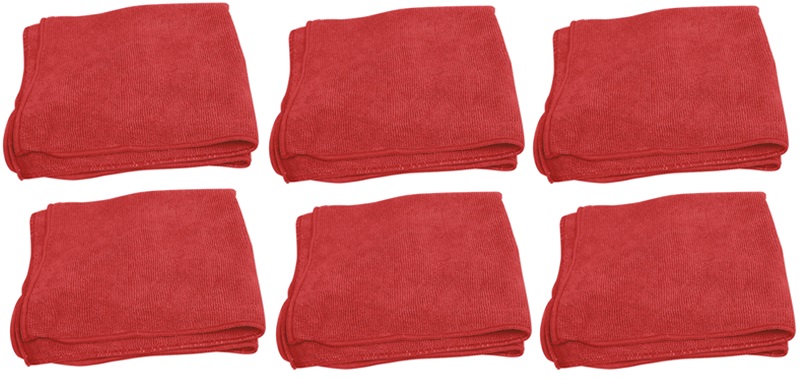
400 x 400mm Microfibre Polishing Cloth

Microfiber cloths are used for cleaning and polishing, are generally constructed from split conjugated fibers of polyester and polyamide.  They can hold up to seven times there weight in water and have exceptional ability to absorb oils, and are not hard enough to scratch even paintwork.

These Microfiber cloths require no cleaning fluid. Ensure that your microfiber cloth is clean and not retaining any grit as it will scratch the surface you are polishing.

They must only be washed in regular washing detergent, not oily, self-softening, soap-based detergents. Fabric softener must not be used. The oils in the softener and self-softening detergents will clog up the fibers and make them less effective until the oils are washed out.

The following diagram illustrates the efficiency of microfiber cloths as opposed to cotton or other cloths. (Information provided by Wikipedia)

Reviews

5
Quality Microfibre

Posted by Co from Quialigo

You get what you pay for !! Remember that when you consider a cheap pack of microfibre from other suppliers. These are top quality and you will know that when you use them because they do what microfibre should, especially when drying smooth surfaces like glass or polished bench tops.

    5
Quality vs Price

Posted by Unknown

There are cheaper options available, but I found the microfibre cloth from Polish Up to be higher quality and you will notice this when it comes to using them. Be aware of quantity packs at what will seem to be “a good price”. You get what you pay for!!

samuel zeller

Polish Motorcycle Parts

muhammad muzamil QZgDEpnlvrU unsplash scaled 1

Polish Up your Bike To Look New

You have a bike that's not looking to good. A little worse for wear. The alloy has oxidised, the stainless is dull and the chrome work needs attention. Use one of our kits or a combination of Polish Up's products to restore it to its former glory.

IMGA0035  28836 1

Keeping your Bike Looking Schmick

Looking after your prized possession and the plan is to keep it looking top notch. Thing is what do you need to do this?
One of our favourite product is Blue Sapphire Polish. Most polishes leave a white residue in the hard to get to spots and is such a mission to remove. With this polish, just use high pressure air and it'll blow it away leaving you metal looking great..

Starting from Scratch

Prepare The Surface

The devil is in the detail: The better you prepare the surface the better the finish. Prep your metal surface to 800-1200grit wet and dry abrasive paper. (If it is very tarnished. If it’s just badly oxidised then moved onto the next process).

What Machine To Use

If you are polishing the parts on the bike then ideally use a variable speed drill machine or a variable speed flexishaft machines. 50mm to 100mm polishing wheels. Ideally you can used a bench polisher for individual parts polishing. This would mean removing the parts from the bike to polish them.

Cutting Combinations

For the cutting combination, used a treated sisal or airflow wheel and grey cutter or brown tripoli. A colour stitch wheel can also be used but will not be as aggressive. It really does depend on how much work you need to do on the surface. The treated cutting combination may be too aggressive, so use the colour stitch combo.

Tips And Tricks

Often a residue with be left on the metal surface consisting of metal and compound. This can easily be removed with Vienne Lime and a microfiber cloth. By dipping the cloth in the powder and wiping the residue away. Instead of using a flammable solvent. It’s also a good idea to freshen your polishing wheels up with a wire brush on a regular basis. The wheels tend to pick up metal and fleck marks will appear on the surface during polishing if you don’t do this. If you’ve removed the abrasive marks and the surface appear slightly dull, you can move onto the next process.

Finishing Combinations

Use a white stitch or natural airflow wheel with with your Green Chrome or other finishing compound. This should bring the metal up to a very high mirror like finish. A loose leaf calico can also be used with the finishing compounds.

Applying Metal Polish

Ensure the surface is free of any residue and apply your metal polish with a clean, soft, cotton cloth. Have a good read on the polish application instructions.

Maintenance Polishing

For maintenance, you can use a calico wheel with Multishine compound or if the surface is slightly dull, some metal polish again. Depends on how often you clean your bike.

Save you Time: Here are some links to kits

Polishing kits for your truck

This video is indicative of what these kits can do.

Airflow Coolair Polishing Kits to Trucks, Tanks & Bulbars

A very popular range of Airflow Alloy Bullbar Kits.Used mainly to polish trucks and rigs bringing those wheels, bull-bars, fuel tanks, chrome and stainless steel surfaces to a very high finish.

Surface Preperation

Before using the kit, the metal surface should be prepared with 800-1200 grit wet and dry abrasive paper. The better the surface is prepped, the better the the finish.

What’s Included in the Kits

The kits generally include a cutting and finishing combination. The cutting combination i.e. (yellow) treated airflow with brown Tripoli for alloy or Course Cutter for stainless steel removes fine abrasive marks and leaves the surface with a dullish finish. The finishing combination i.e. (white) natural aiflow with the Green Chrome or SS Finish Stainless Steel will bring up your metal surface to a very high finish.

Some Tips & Tricks

What you’ll also find in these kits is a tub of Vienna Lime or whiting Powder. Whilst you are polishing, residue compound or black grease will stay on the metal surface. Using a microfiber cloth, dip the cloth into the powder and wipe away the residue.This will save you a lot of downtime between compounds and polishing wheels as you need to remove the residue before using another combination. It literally cuts away the residue.

There are often smaller polishing wheels in these kits. These are used for those smaller, tighter areas. Used with a drill machine, usually a tapered drill adaptor, the same principle is used as the airflow wheels.

It is suggested that you use a wire brush to “freshen” the polishing wheel every few minute to remove residue compound and metal build-up accumulated during the polishing process. If you don’t then fleck marks begin to appear on your polishing surface. This will be caused by metal picked up by the polishing wheel rubbing against the surface you are working on. Use a wire brush held against the spinning wheel. Once done, reapply some more compound.

Apply compound to the polishing wheel as it spins. Do this for just a second or two as not a lot of compound is required.

Use the metal polish once you’ve finished polishing. It’ll give the surface a deep rich lustre.

Very easy to use with simple instructions.

Polish Up has a broad selection of Buffing Polishing Kits

General Polishing Instructions

General Instructions For Polishing

Suppliers of an extensive range of polishing products and accessories to professionals, retailers and the DIY enthusiast.

What is Polishing 

Polishing sometimes known as finishing, buffing or colouring is the process of removing scratches and abrasions from a surface, and creating the desired brightness of finish on thatSS Polishing Kit surface.  Polishing, like using sand paper, consists of procedures each of which is less abrasive than the previous. A combination of mops and compounds are used with a buffing machine or a household electric drill (pneumatic tools may also be used but only at relatively low speeds (4000 rpm max.)

Different combinations of polishing wheel and compound gives the desired cut / colouring action and finish. To avoid contamination or mixing of compounds use a different mop for each compound. Do not mix different compounds on the same mop. Alternatively “freshen” the polishing wheel with a wire Alloy wheel kitbrush to remove residue compound and metal from the wheel.

If you are polishing small articles then you can fix your drill into a vice, this will enable you to polish these small articles with ease.

Sometimes when you have polished you may see a slight coat of grease or finger marks on the work piece, these can be removed with Whiting Powder followed by Liquid Reflection or Mirrorfinish Metal Polish to complete the job.

If you wish to Electroplate or lacquer the polished article please make sure you use a good degreaser and do not protect with wax polish. Any dirt or grease/wax will interfere with the FullSizeRenderadhesion of the plated metal or lacquer.

Safety First!

Always make sure that the machine you are working with is in safe working order i.e. bench grinder is securely fastened to your work bench, adaptors polishing wheels are securely fastened etc.

Always use safety equipment- Dust mask, safety spectacles and gloves should be worn at all times. 

Always apply the item being finished to the area of the mop which is rotating away from yourself.

Do not wear loose clothing that may get caught in the machine.

Surface Polishing Preparation 

Unclean/dirty/greasy material should be prepared properly before being polished. For polishing soft metals and depending on the surface condition, start at 6 on the step by step guide above. Should parts be heavily scratched, marked or scored then suitable abrasives should be used.( flap wheel, abrasive cloth/paper, rubbing blocks etc. )

In many instances the surface of what you are polishing will need to be prepared prior to polishing. The preparation really depends on the condition of the surface and the desired finish you require. The devil is in the detail hence the better you prepare the surface the better the final result. The use of wet/dry abrasive papers and discs may be required and the finer the abrasive, generally the easier and more impressive the polished finish.

Step By Step Guide To Polishing

  1. 1. Attach arbour to your drill or spindle adapter to your bench grinder / polisher and fix tightly.
  2. 2. Attach Sisal Mop onto the arbour/adapter and screw on tightly.
  3. 3. Run the drill / bench grinder / polisher and apply the relevant compound to the sisal mop for approx. 2 seconds, the compound is wax / abrasive based so the motion of the spinning mop generates heat which melts the wax/abrasive onto the polishing mop.
  4. 4. Apply the mop to the item to be polished with medium/hard pressure. It is very important that you remove all marks/scratches and leave a uniform finish.
  5. 5. Apply more compound to the Sisal Mop if needed. When all scratches/marks are removed and the work piece has a uniform dull finish, remove the Sisal polishing mop.
  6. 6. Attach the White Stitch / Colour Stitch Mop onto the arbour/adapter and screw on tightly. Run the machine and apply the relevant compound to the White Stitch / Colour Stitch Mop for approx. 2 seconds.
  7. 7. Apply the mop to the item to be polished with medium pressure. This will remove the dull finish left by the first process and leave the work piece with a semi-bright finish.
  8. 8. Apply more compound to the White Stitch / Colour Stitch Mop if needed. When you have a uniform semi-bright finish, remove the White Stitch / Colour Stitch Mop.
  9. 9. Attach either the unstitched B Quality Mop onto arbour / adapter and screw on tightly.

Run the drill / bench grinder / polisher and apply the relevant compound to the unstitched B or G Mop for approx. 2 seconds.

  1. 10. Apply the mop to the item to be polished with light pressure. This will remove the semi bright finish left by the second process and leave the work piece with a bright finish. Apply more compound to the unstitched Mop if needed and repeat the process.

You should now be left with a bright finish.

  1. Using a clean microfiber cloth, rub the polished article with Whiting Powder/Vienne Lime or Liquid Reflection, Reflection paste or Blue Sapphire. This will remove any residue compound, metal and grease left on the surface and provide you the polished finish.

TipsTips 

Try to constantly vary the directions of which you polish. This is not always possible but recommended as some articles may be of an unsuitable size and shape.

Use compound sparingly, black grease marks will appear on work piece if too much compound has been applied to the mop. Remove black grease marks with cloth. Remember little and often. If it is possible, polish across marks/scratches not along them.

If the surface of work piece is lacquered you must remove the lacquer before polishing.
Spindle adaptor kitDrill-Polisher-Grinder Adaptors

Spindle adaptors, tapered Mandrels are used to secure your polishing wheels onto your drill machine, bench grinder, variable speed polisher/grinder etc.

Before purchasing an adaptor check the dimensions of the shaft and threads to see if we have the relevant adaptors for your machine.


Description Of  Polishing Wheels & Mops

Sisal Polishing Wheel.6inch Treated Sisal_edited-2

These are very fast cutting and hard, they are particularly useful for first stage heavy duty mopping operations on steel and non-ferrous metals. They will remove grinding marks left from previous operations, when processing steel, stainless steel or non-ferrous metals and are usually used in conjunction with a coarse cutting stainless steel polish.

CS setColour Stitch     White Stitch Polishing Wheels.WS set

Versatile cutting mops used for general polishing, can be used for first stage polishing with Brown polishing compound on soft metals (brass, copper, etc), or for second stage polishing on hard metals with Pink polishing compound.

4 x 1sec LF SetLoose Flap Quality Polishing Wheel.

A harder grade of loose mop which is commonly used as an alternative to white stitch mops. Very popular for precious metals.

SD setSwansdown (WDR) Polishing Wheels

A very soft grade of finishing mop. WDR means “white double raised” and these wheels are also know as Swansdown wheels. Generally used for soft precious metals, jewellery etc. in the final finish.

Airflows_edited-1Airflow Treated and Untreaded Polishing Wheels

Quality materials are used in the manufacture of these wheels, ensuring a longer mop life and greater output compared with conventional mops. They are very clean in operation and are specially suited for heavy duty moping and finishing on metals, plastics and other non metallic materials. The treated Airflow wheels are more aggressive and used in the cutting, first stage of polishing whilst the untreated airflows are for finishing.

Mandrel MopsDome Cylinder Goblet Polishing WheelsSisal Mandrel Kit


Supplied in sisal and calico these drill mounted polishing mops are used to access tight and difficult to reach areas.

Excellent for use in maintenance kits, the calico mops can be used with most of our compounds.  The sisal mops can effectively be used with our cutting compounds.

Felt BobsMounted Felt Cylinder Bob

Versatile across many mediums, these medium density points will work on stone, ceramics, metals, as well as jewellery. Bonded onto a 3mm/6mm shaft that fits most rotary tools or drill machines. These felts tools are a popular and economical method of polishing when used in conjunction with compounds.

Description Of Polishing Compounds

There is a substantial range of cutting, polishing, buffing compounds suited to different levels finishes depending on the polishing wheel and compound combinations.


Blue-1 copyBlue bar = Multishine: The multi-purpose finishing compound. Suitable for all metals. Also performs well as a cutter if used on a hard cotton or sisal buff.

Tripoli-1Brown bar = Tripoli: Combined cutting and finishing compound for soft metals only. Suitable for alloys, aluminium, brass, copper and zinc diecast. Follow up with a finishing compound if a brighter surface is required.

GREY-1Grey bar =Course Cutter: A fast and economical cutter for hard metals. The rate of metal removal is high, with less emphasis on brightness. To be used on sisal buffs for the removal of scratches and “orange peel” from all metals.

Green bar = green ChromeGREEN-1: For mirror finishing with minimal cut. Best used after a perfect cutting or prepolishing operation. Polishes all metals to high brightness when used on a soft cotton buff.

White bar = SS FinishWhite-1: For high brightness and good cut. Suitable for all metals, including stainless steel. Recommended for surfaces that are smooth to begin with and are free of deep scratches. Use a sisal buff for cutting and a cotton buff for bright finishing.

Terracotta bar = Bright Cut DXLBROWN-1

:  A fast cutter for all metals with medium brightness. May be used on a sisal buff for cutting, followed on a cotton buff for medium brightness.

VL 500gVienne Lime Cleaning Powder Or Whiting Powder: Excellent for use with our polishing kits. Use this after you have finished polishing to remove grease and compound residues after polishing. Apply it to a clean lint free cloth/microfibre and wipe where you’ve been polishing. Please note that Vienna Lime is not an actual lime powder but a pure form of super fine calcium carbonate (chalk). This will save you time and effort as opposed to using white spirit or other methods.

PolishesLiquid Reflect, Blue Sapphire, Mirrorfinish metal polishes and many others are used in your final application to maintain a long lasting bright finish to your polished surface. These polishes can be used in the maintenance of your polished items as well.

wet1Surface Preparation Abrasives

Flap wheels are designed to be flexible and conform themselves to the shape being sanded. Flap wheels flex to the different dimensions and shapes of the work piece and sand flat, high and low areas with the same effectiveness. Surfaces include wood, metal, plastics, rubber, stone. Wet and dry abrasives up to 2000grit are ideal for the surface preparation of most metals and can be used before moving onto the buffs and compound combinations.

Visit our website at www.polish-up.com.au to view a wide range of products and services that include the following applications:

Kits to polish glass, metals including alloys, aluminium, chrome, stainless steel, steel, copper, brass, precious metals and jewellery

Australia based, we ship Australia wide and internationally.

You can polish your motorcycle, golf clubs to new, car, truck, ute, boat, alloy wheels, fixtures and fittings to exceptional mirror finishes. The polishing wheels fit bench grinders, electric hand drills, polisher sander grinder machines. Choose from our selection of adaptors and accessories for a simple conversion.

Alloy Wheel & Aluminium Polishing Kits

Get your wheels to shine with our Polishing kits

These Alloy wheel polishing kits are amazing

From Dirty to Desire – we will help you get those wheels to shine.

You love your wheels? You love that aluminium bulbar? You love your car? And you paid good money for it all, so why not protect it and keep it shining forever?

With our range of  Alloy Wheel & Aluminium Buffing Kits available, you never need to worry about it again. We have a kit for every application from simple polishing and maintenance to a comprehensive sanding back with polishing grinder included for that professional look. And we don’t restrict our kits to just cars, there is a range of products for motorbikes and trucks as well.  All our kits come with full easy to follow instructions to have your vehicle shining out from the crowd.

Whether you are a professional detailer or DIY enthusiast, our polishing products will remove scratches and abrasions from any surface and restore the polish to its original condition and preserve it for longer. For the DIY enthusiastic, there is no need to buy any special tools as a pneumatic drill at relatively low speed (4000 rpm max) will do the job. We offer a vast range of adaptors to secure your polishing wheels to your drill. Just remember to start with a cleaned surface so there is no lingering lacquer on the metal, apply the compound sparingly and rub in different directions to fully polish your wheels or bulbar. We offer a range of polishing wheels to adapt to most shapes and applications. Don’t leave the grime on your wheels to eat away at the metal, when you could have shining wheels in no time at all.

If you are a collector and intend to show your car, for the very best effect consider removing the wheels and cleaning and lightly polishing the inside of the wheel. The reflection from the bright alloy behind the spokes and around the inside of the wheel rim dramatically improves the appearance of the wheel. You normally see them only when the inside surface is covered with dirt and brake dust. Our compounds are safe to use for the most valuable collections.

Why not give the golf clubs are polish up as well? It doesn’t guarantee your swing will improve but it will prolong the life of your clubs and make the opposition green with envy.

Keep on Polishing Up…..Did you enjoy this post?  Subscribe to our blog.

Rex

Search for products

Back to Top
Polishup